Section Topics
Using Additional Fields in InterAction Windows Client
You can set additional fields for any of the folders that contain a contact to which you have appropriate access. To access the additional fields for a contact, open the contact details for the contact and choose the Additional Information view.
If an additional field is a multiple-value field, the values for the field appear with semicolon separators between the values. When you select the field in the view, a section at the bottom displays the values and any secondary fields.

Viewing Multiple-Value Additional Fields in InterAction Windows Client
Organizing Additional fields in the InterAction Windows Client
You can sort the Additional Information view by any of the columns by clicking on the column heading. The Category column is especially useful for sorting as it allows you to group similar additional fields. The context bar for the Additional Information view contains a folder filter and a global filter.

Use these filters to choose exactly which additional fields you want InterAction Windows Client to display. Remember that to see folder-specific information you do not have to actually have the folder open; you just need to have appropriate access rights to the folder.
Set or Edit an Additional Field Value
NOTE Your ability to add, edit, and delete information in InterAction is always subject to access rights. See the Configuring InterAction guide for more information.
-
Log on to the InterAction Windows Client.
-
Open the contact details for the contact and choose the Additional Information view.
-
Select the field you wish to change. To select the field, click once in the value cell for that field.
A solid black line will appear around the cell when it can be edited.
TIP You can use the following keyboard shortcuts when working with Additional Fields:
Tab or Enter keys to move to the next field listed.
Shift + Tab key to move to a previous field,
F2 key to edit a field
Esc key to cancel your changes
-
Do one of the following:
-
Type your entries into the Value cell. This is used for Numeric, Decimal, or Text additional fields.
-
Select the down arrow (
 ) and choose a value from the list. This is used for List, and Yes/No additional fields.
 -
Select the down arrow (
) and choose a date from the calendar. This is used for Date additional fields. -
Choose Edit then choose the lookup button (
 ) to find an InterAction user. This is used for user additional fields.
 -
Delete the content, and leave the cell empty by choosing the Delete key. This can be used for all additional fields.
TIP You can also delete an additional field value by selecting the additional field and choosing Additional Information > Clear.
-
-
Select another additional field to save your changes. Changes made in the Additional Information view are not saved until you leave that field.
Set or Edit a Value in a Multiple-Value Additional Field
-
Log on to the InterAction Windows Client.
-
Open the contact details for the contact and choose the Additional Information view.
-
Select the multiple value additional field.
InterAction displays the values at the bottom of the Additional Information view.
-
Do one of the following:
-
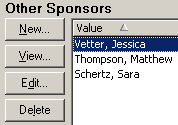
To add a new value, choose the New button.
-
To view the selected value, description, and last edit information for the field, select the View button. (Note: this button may provide a different view of the field value(s) if the additional field is of type Extension.)
-
To edit an existing value, select the value and choose the Edit button.
-
To delete an existing value, select the value and choose the Delete button.
-